 ArchiSpark
Elements
List, create, edit, and delete ArchiMate elements, and read their detail page.
Elements (/elements)
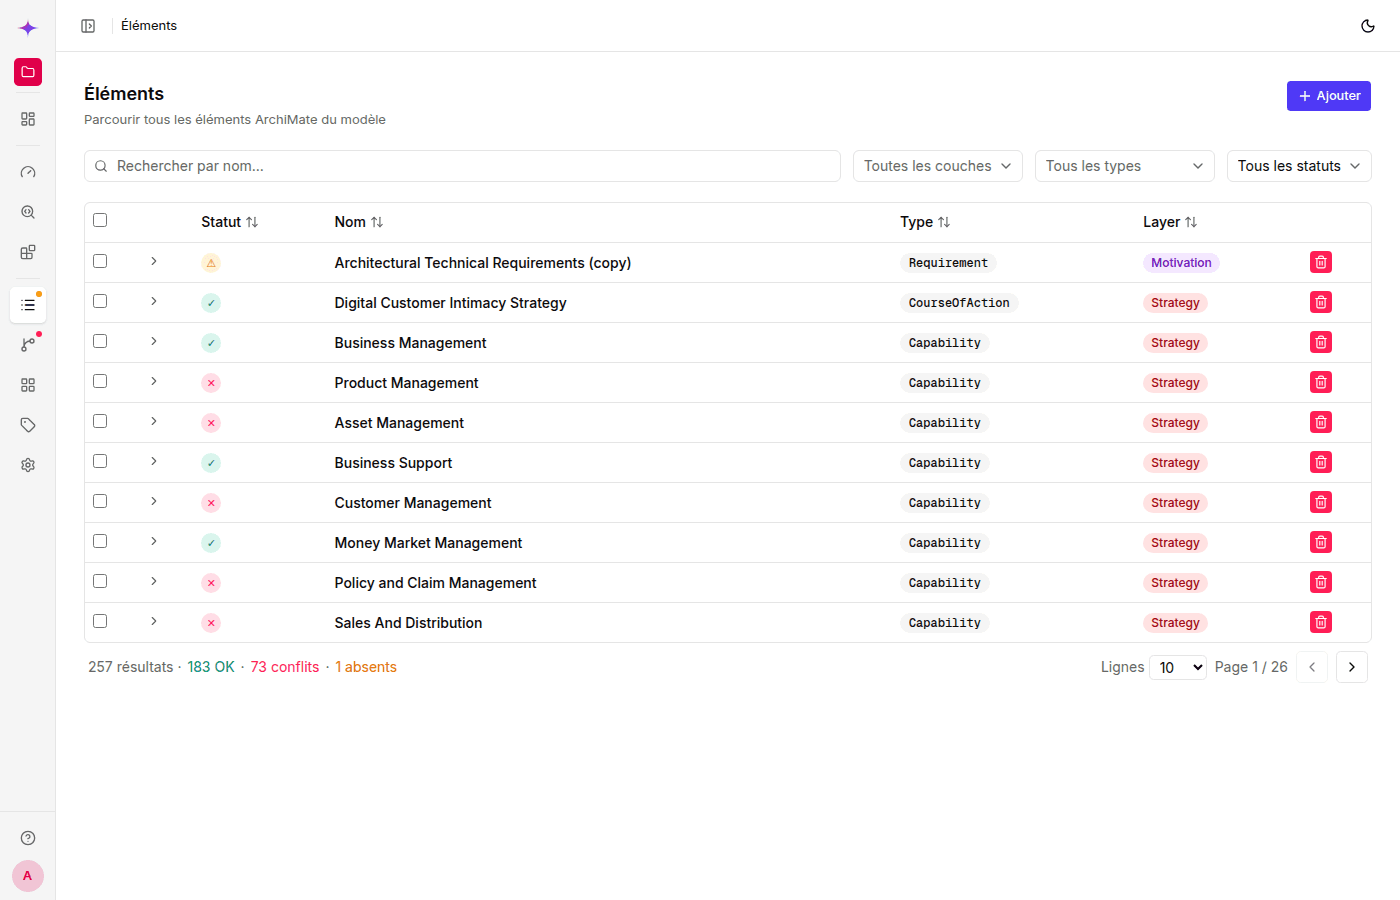
List and filters
The table displays all elements with the following columns: Name, Type (badge), Layer (colored chip), and Documentation.
Two filters are available at the top:
- Name search — filters in real time with a 300 ms debounce
- Type selector — filters by a specific ArchiMate type
Filter by layer
In the sidebar, click a layer (for example, “Application”) to filter the list automatically and update the page title.
Create an element
Click + New element:
- Name — required
- Type — select from 60 ArchiMate element types grouped by layer
- Documentation — free-form description (optional)
- Properties — key/value pairs based on the model definitions (optional)
Edit an element
Click the element name or the edit icon to open the element detail page
(/elements/:id). All fields can be edited inline by double-clicking them.
Delete an element
On the element detail page, click Delete (top right). Confirmation is required. Deletion cascades: all relationships referencing the element and all its nodes in views are also deleted.
Creating, editing, and deleting elements requires write access — see Authentication and authorization for the role model.
Element detail (/elements/:id)
The detail page displays complete information about the element and provides three tabs.
Header
Displays and allows inline editing (by double-clicking) of:
- Type — ArchiMate type badge (opens a selector on double-click)
- Layer — colored chip (Business, Application, Technology, and so on)
- View status — green ✓ if the element appears in at least one view, yellow warning if it is unused
- Name — editable by double-clicking
- Identifier — read-only UUID
- Documentation — editable multiline text
- Specialization — parent element through an ArchiMate specialization relationship
Tab 1 — Properties
Lists all property key/value pairs attached to the element.
- Add a property: click + New → select a property definition → enter a value → confirm
- Edit a value: double-click the value cell
- Delete a property: click the delete icon on the row
Tab 2 — Relationships
Lists all relationships in which this element is the source or target.
| Column | Description |
|---|---|
| Status | ✓ allowed / conflict under ArchiMate 3.1 rules |
| Type | Relationship type (Association, Realization, and so on) |
| Name | Optional relationship name |
| Source | Source element (link to its detail page) |
| Target | Target element (link to its detail page) |
Click the expand icon to expand a row and see validation details or other allowed types.
Available actions: + New relationship · Edit · Delete
Tab 3 — Graph
A graph showing the element and its direct relationships.
- Central node — current element, fixed in the center and highlighted with a colored ring matching its ArchiMate layer
- Neighboring nodes — each connected element, colored according to its own layer
- Edges — only the relationships used to reach nodes from the current element, labeled with the relationship name or type
- Nodes are positioned automatically; the view fits the content
- Click a neighbor to open its detail page
- Pan / zoom with the mouse — controls are available in the bottom-left corner
- Use Appearance in the top-right controls to choose the edge style and switch between vertical and horizontal layouts
- Use the fullscreen control below Appearance to expand the graph; press Escape or the minimize control to return to the page